Animal Protein, Eat, Savoury

THE Ultimate Christmas Dinner

Serves 4

Christmas dinner, Sunday roast or quite possibly your weekly meal prep, this meal has EVERYTHING going, to quote Joey from friends “Peas good, potatoes good, meat GOOOOD”

I loved this dinner so much that I actually took it with me on the aeroplane Christmas Day, on route to Japan, just so that I wouldn’t miss out on any Christmas dinner, and lets be honest – Roast dinner over aeroplane food? Is there really any need to question?!

This meal is 100% paleo approved and quite frankly its so very simple to make. 

So if your keen to relive that Christmas dinner experience whatever the weather, look no further than the directions below.

Ingredients:

For the vegetables: 

Cooking time:  45min

Prep time: 10min

X2 Medium Parsnips

X2 Medium Swedes

X2 Medium Broccoli

X1 Large sweet potato

X4 Stalks of kale

X1 Large bag of mushrooms

X1 Medium red pepper/capsicum 

As many Brussel sprouts as you desire

X1 Small Beetroot

Coconut oil

X2 tbsp mixed herbs – fresh or dried

Salt 

PLEASE WASH ALL VEGETABLES BEFORE PREPARING.

Beetroot takes the longest time to bake due to It’s water content, so once you’ve chopped and diced the beetroot you will need around 1 hr of baking time, no oil yet, just salt to dry it out, later when it looks dried out, you can add the oil to give it a crispy texture.

Place swedes, sweet potato and parsnips in a large baking tray with x2 TBSP of coconut oil, sprinkle your mixed herbs over, stir the vegetables around the pan so they get an even coverage of coconut oil to brown and crisp up. 

Place in oven for 45 mins at 190 F

Next, make up a new tray for mushrooms, broccoli and capsicum, chop and dice however you wish, just add salt to these and cook up for 20min

We need another separate pan for your roasted kale, add x2 tbsp of coconut oil and a generous sprinkle of salt rub and massage kale into the oil so it gets coated in oil, giving it a beautiful nutty crunch when cooked. Bake for 5-8 mins

For the chicken:

Cooking time:  45min

Prep time: 5min

Cajun seasoning 

Black pepper

Salt

Bacon – optional

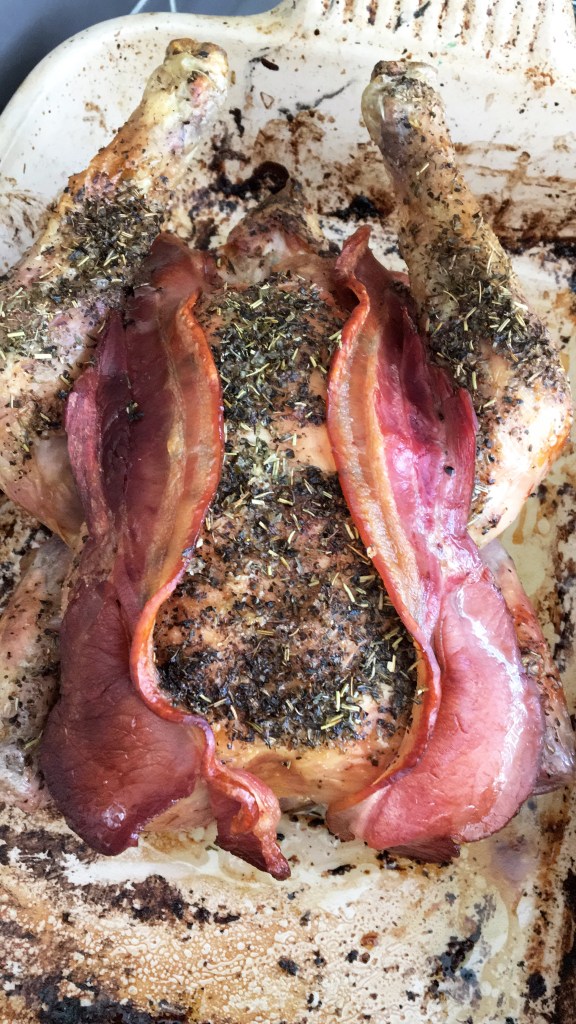
Place chicken in a large dish with half a cup of cold water. Coat the chicken in coconut oil and season with cajun spice, salt and black pepper. 

Place chicken in oven on middle shelf for 45min at 190F 

To check chicken is cooked the juices will run clear and the meat will be white. Do not remove chicken from the oven if the meat is red or pink. 

Add bacon part way through baking – toward the halfway bake if desired to the chicken breast 

For the gravy:

Cooking time:  20min

Prep time: 5min

X1 small tin of tomato paste

Sprinkle mixed herbs

X1 cup of boiling water

X1 tsp Boost Bone broth concentrate from https://au.meadowandmarrow.com/?gclid=Cj0KCQiArdLvBRCrARIsAGhB_sxCRUXJL0JPvlB3gxLNElpGoSCtomg7BZES_fP6M5wvZkBNZ1cVdEoaAnNuEALw_wcB

Mix all ingredients together in a small saucepan and heat until thickened. 

For the stuffing balls:

Cooking time:  20min

Prep time: 5min

X2 Free range, organic sausages

Mixed herbs

X1 cup almond meal

X1 egg

Black pepper

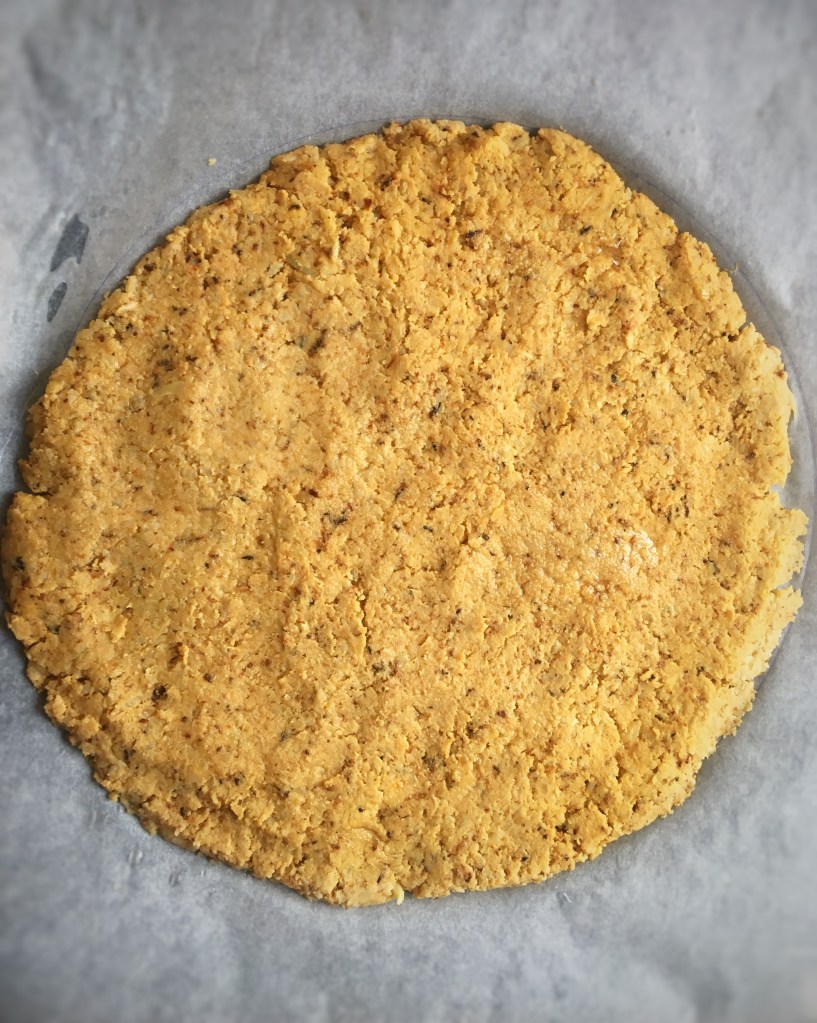
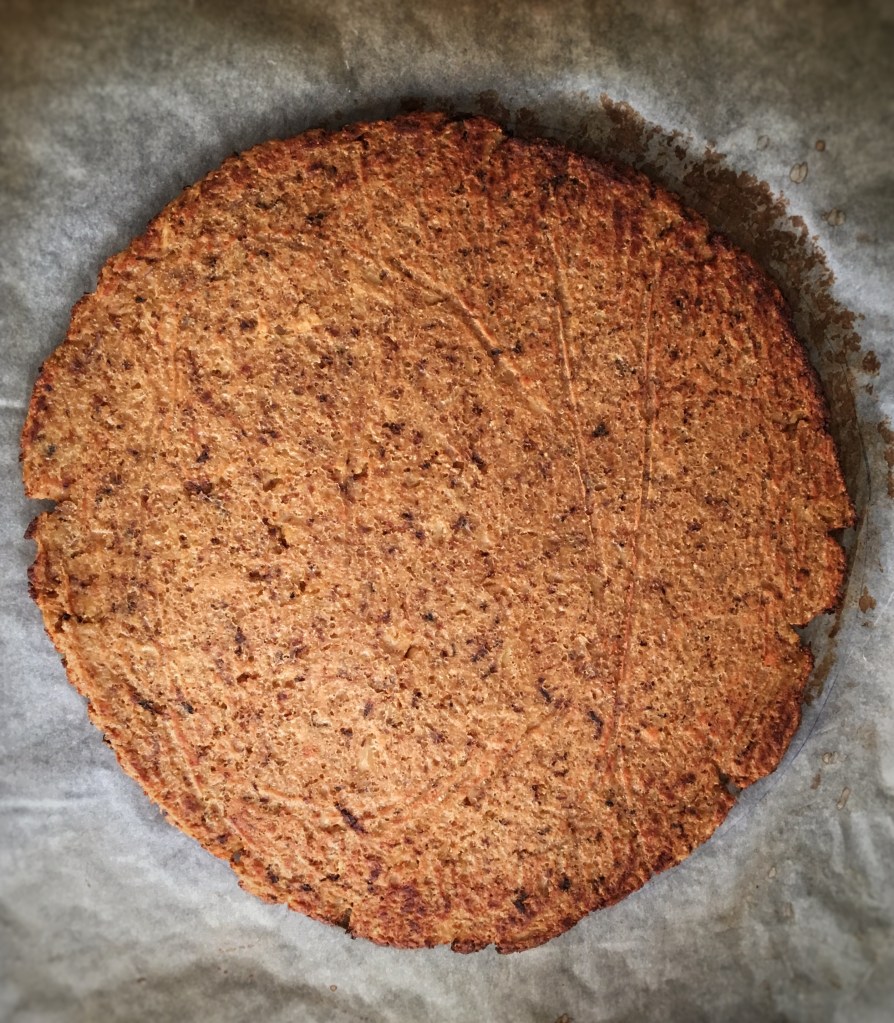
Carefully cut down the sausage to remove the meat and add to a bowl, add all other ingredients and mix. Tablespoon mixture into the palm of your hand to make small stuffing balls. 

Bake in oven for 10-15mins

Plate it up!

Arrange all the veggies on the plate just as you would like them, cut away all the chicken from the bone so you are left with moist, juicy chicken. Drizzle the gravy as you desire, then serve up and enjoy. 


Eat, Savoury

Paleo Cauliflower Pizza

Who doesn’t love a slice of pizza?!

I for one used to be the regular to binge on a take out pizza of a Saturday night, meat lovers was my go to, slathered in the rich sweet yet salty bbq sauce, I’m certain now my arteries are thanking me for cutting these out. Now things have changed a little and a while ago I decided to take on the challenge and make and create my own cauliflower base pizza, like so many other food bloggers had done before me, after all how hard can it be? 

Well, not so hard it would seem, If you’re willing to spend a bit of time cooking up this masterpiece, It will be totally worth it when it comes to devouring the whole thing (unless you’re willing to share) I can assure you, like anything worthwhile it takes a bit of time. Like any of my recipes, bake this with an open mind to explore new flavours and textures, as we all have different preferences – this is not a wheat based pizza, therefore it wont taste like your staple pizza base – In my opinion, it will taste better! This Pizza base holds together beautifully, its soft, light and herby, when topped with the rich tomato sauce and all your favourite toppings the whole pizza comes together and each slice is truly incredible, so lets get stared;  

Ingredients:

Serves 1-2

Pizza base:

  • 1/2 Cauliflower head
  • x1 cup cavassa flour
  • X2 pasture raised eggs
  • 1 tsp baking powder
  • 1 tbsp coconut flour
  • 1 tbsp water
  • Pinch of salt

Tomato base:

  • x3 tbsp tomato puree
  • 1 tbsp mixed herbs
  • X1 clove garlic
  • 1 tsp chilli flakes
  • Cracked black pepper

Topping ideas:

  • Roasted artichoke
  • Red bull horn pepper
  • Mixed olives
  • Button mushroom
  • Red onion
  • Maple bacon (please choose organic/free range pasture fed pork)

Method:

Pizza base:

Using a hand held grater or if your lucky enough to own a food processor, grate half a cauliflower head and bake for 20min, seasoning with salt to dry out the moisture. Bake at 180C. Check on the cauliflower and stir around the baking tray to ensure each piece of grated goodness is baked. 

When your cauliflower has partially dried out, remove from the oven and leave to cool for a moment whilst you mix up your cup of cavassa flour, tbsp of coconut flour, 1 tsp of baking flour, water, salt and eggs. We want to add the cauliflower in when its warm to cool as if we add it in hot, the eggs will scramble. 

When all mixed together you should have a slightly sticky ball of cauliflower, please don’t expect it to look like a ball of dough, it will look and feel a little different but I can assure you this will bake beautifully! Grab a piece of baking paper (enough to cover your baking tray) place a large dinner plate upside-down on the paper and draw a circle around the plate to score a circular outline to press your base around. I oil the back of a stainless steel spoon and press the base down as thin as I can whilst keeping within the circular outline. 

Place your cauliflower creation into the oven at 180C for around 10-15 minutes. When browned and crispy to touch, flip the base over and bake or a remaining 5 minutes. 

Tomato base:

This is the easy part, here you take 3 tbsp of the tomato puree and place in a bowl, add the mixed herbs, black pepper, chilli flakes and garlic clove and mix them altogether. 

Let’s build this beauty:

When browned and firm to touch, remove your cauliflower base from the oven and leave to cool for 2mins. Take your tomato puree topping and spread evenly across the base, chop and prepare your toppings as you wish and spread them evenly across the pizza. When you’re happy with the way your pizza looks place it in the oven to cook for a further 10-15mins until all the toppings look soft and browned. By no means is this a quick, store bought, oven baked pizza, but it is delicious and truly believe its worth the wait. 

Remove from the oven – let it sit for 5, take some photos of your creation and show me! Then by the time you’ve finished food snapping, your pizza will be ready to eat!

For an extra touch you can add a drizzle of EVOO to finish and I’ve actually in the past added a fried egg which I believe works very well, If you like to eat your pizza with ketchup, why not pair it with my Zingy paleo tomato sauce; https://goodnessgreen.blog/2019/04/09/homemade-paleo-ketchup/

Eat and enjoy with the piece of mind that every single bite of this pizza is totally healthy and wholesome! 

Eat, Pancakes, Sweet

Gingerbread Pancakes

Pumpkin spice, gingerbread, chai, cinnamon swirl, you name it, if its naturally flavoured with any sweet spice I’m ALL over it! A gingerbread stack of pancakes has been on my bake list for quite sometime and even though the ‘Autumn season’ has officially ended here in sunny Australia, I aim to continue it on throughout the year. Here I have whipped up a tasty stack of gingerbread pancakes which contain 100% pure naturalness, topped with oak barrelled maple syrup and activated nuts and seeds, the flavours in these pancakes are subtle and warming. SO, SO good in my opinion. If you like the taste of gingerbread cookies, these pancakes should hit the spot, they certainly did for me. 

Ingredients:

Makes around 4 pancakes

X2 tbsp of Cavassa Flour

x 1 tbsp of almond meal

x 1 tbsp coconut flour

x 1 tsp baking powder

x 1tsp vanilla extract

X2 pasture raised eggs

x2 tsp ground Ginger

x1 tsp ground cinnamon

x1/2 tsp ground all spice

x 1/2 cup of fresh almond milk

x1 tbsp water

X1 small fresh or frozen banana or half a large banana 

Pinch of pink rock salt

Method:

Start by adding ALL pancake ingredients into a food processor, blitz up until smooth and gloopy.

Heat a frying pan with coconut oil on a medium heat and tilt pan so oil spreads evenly around the pan.

Using a ladle or tablespoon scoop and pour the runny mixture into the pan so it forms a small circle in the middle, when you see air bubbles start to rise up through the pancake this is the all go to start flipping! Ensure you have a quality spatular that can easily slide under the pancake so you achieve a successful flip each time. 

Each pancake should require around 2 mins frying time each side. 

Animal Protein, Eat, Savoury

Paleo Quiche

When I used to live in paddington, on the long commute back home of a Saturday afternoon, I would occasional stop by a health store that was also a cafe, serving a whole variety of delicious vegetarian meals, in there glass fridge they would have a paleo quiche that on the rare occasion I would say F it, I’ll pay $9 AUD for one slice of this delicious goodness, I remember thinking, one day I will learn to make my own as the cost of one slice from this cafe is quite frankly a joke and lets be honest how hard can it really be to make?

This was about 2 years ago and I’m now getting around to making it up from scratch. I’m not sure why it took me so long to make a paleo quiche but I’m now thinking holy hell, this is an absolute game changer! I could potentially eat this everyday for breakfast, lunch and or dinner anytime! It’s so easy to make, inexpensive, SO SO nutritious and eating it is a pleasure! Already I’m fuelled with new ideas for different ingredients and flavours to experiment with. If you’ve got a spare 20mins in your day to prep up this king creation then you will be sure to fuel your insides with all the goodness this quiche has to offer for the week. 

Lets get started…..

Ingredients:

Add in whatever takes your fancy – these are the ingredients I baked inside;

The Filling:

  • 1/2 Roasted Zucchini 
  • 1/2 Roasted Red onion
  • 1 Garlic clove
  • 1 cup Chopped Butternut Pumpkin 
  • 1/2 Beetroot
  • Handful of Green Beans
  • 1 cup of Button Mushrooms
  • 1 TBSP Mixed seeds
  • 1 TBSP Coconut flour
  • 1 TBSP Gelatin
  • 1 can Organic creamed coconut flesh
  • 1 TSP Ground Coriander 
  • 1 TSP Ground cumin 
  • 4 Eggs
  • 1 TBSP Filtered water
  • 1 TSP Chilli Flakes
  • Pinch of rock salt
  • Black pepper to taste

Base/Crust:

  • 1.5 cups of LSA Meal (linseed, sunflower seed and almond flour)
  • Pinch of salt
  • Black Pepper to taste
  • 1 TSP cumin powder
  • 1 TSP liquid coconut oil
  • 1 TBSP Water
  • 1 Egg

Method:

Starting with your veggies, I very thinly (the width of a sliver 5c coin) slice up the zucchini, beetroot, onion and button mushrooms and lay them individually in a cast iron baking dish in the oven for 10-15mins at 180C.

I place the butternut and green beans in boiling water and leave to soften for around 10min on a medium heat. 

Whilst your veggies are cooking you can start to make up your batter, which consists of the eggs, cumin and coriander powder, salt, pepper, water, chilli flakes, coconut flour, gelatin, mixed seeds and coconut cream. Whisk these altogether with a hand held whilst to combine all the lovely flavours.

Set aside for a moment and start to make the quiche crust;

This is super easy to make, all you need is your pie tin/dish 23mm wide. In a large mixing bowl, combine all ingredients and mix until you have what resembles somewhat a dough ball. 

Greece your pie dish with oil and place the dough ball in the middle and start to flatten down the crust with the back of a metal spoon. 

Once flattened, prick the base with a fork and when your veggies have browned and crisped up to your liking, remove form the oven and place the pie dish inside to cook on a low heat around 160C for round 10mins – when removed the crust base should feel firm to touch. Set aside and leave to cool. 

Next, when all vegetables are cooked through, including your butternut and green beans, place them into your coconut cream and egg filling. 

Stir to combine and pour over the crust base, gently place inside the oven to cook for 15-20mins at 180C until the filling has risen, looks brown and firm to touch. Be careful when testing the texture, as it may still be very hot. 

Once cooked through leave aside to set and cool for around 15-20min. I actually left mine to cool for a few hours, placed it the fridge and ate it cold for breakfast the following morning, it was fantastic! I’ll be completely honest I actually ate half of this quiche throughout the day as it was so tasty! I hope you enjoy it as much as I do!

Let me know if you have any comments or questions on this, id love to hear your thoughts. 

Eat, Spreads

Almond and Macadamia Nut Butter

I feel like I’m team macadamia on just about everything lately, I’ve always loved this robust little nut but I’ve never experimented with it enough to realise that it’s actually fantastic to work with!

Check out my recipe for the creamiest most delicious Macadamia nut milk; https://goodnessgreen.blog/2019/09/11/macadamia-milk/

I think these two flavours pair really well and together they make a really nutritious spread, check out the recipe and make this delicious spread for yourself and see. 

Ingredients

  • 1 cup Roasted Almonds
  • ½ cup Roasted Almonds
  • 1 tbsp coconut oil
  • Pinch of rock salt for a flavour kickMakes around 250g of spread

To Make

You can toast raw nuts yourself on a low heat at 160c together in a tray for around 15minutes, be sure they become a golden brown when removed from the oven. Otherwise you can purchase both nuts and seeds pre roasted. Just ensure they have not been roasted in any vegetable oils before purchasing.When cool, add all nuts plus 1 tbsp of the coconut oil to a food processor and blitz up on the highest setting. Add more coconut oil as you go to get the optimal consistency you desire. Blending time will take around 2-4mins, add additional roasted, chopped almonds or seeds toward the end if you want a smooth spread with a chunky, crunchy texture.Spread and enjoy.

Animal Protein, Eat, Savoury

Shakshuka

What is Shakshuka?

You may know this meal as ‘baked eggs’ in some cafes that will serve this dish up in a traditional cast iron skillet. This middle eastern meal is great at any time of the day as it’s filling, nutritious and it takes merely moments to create as it’s a one and done recipe. The delicious combination of eggs, tomatoes and spices originating from the east make this breakfast banger one to wake up to.

Serves 1

Ingredients: 

½ red onion

1 yellow red pepper/capsicum

1 red pepper / capsicum

1 garlic clove

½ grated red chilli

3 button mushrooms

½ Avocado

½ cup of chopped sweet potato

2 pasture raised eggs

1 can of chopped tomatoes

Handful of chopped parsley

 2 tsp smoked paprika

1 tsp ground cumin

Pinch of rock salt

Black pepper

½ cup of water

Optional:

Coconut yoghurt

Chorizo

Method:

Cook time: 25-30mins

Set your oven on a fan forced setting at 180c.

In a large mixing bowl place all ingredients EXCEPT your pasture raised eggs and yoghurt.

Mix together the ingredients until it forms a chunky salsa like consistency, stir so all spices have coated the veggies. Grease your skillet pan in a nut or avocado oil (something with a high smoking point, to avoid releasing any dangerous toxins found in highly processed vegetable oils) when this is done you can add your coated veggies into the pan and place in the oven for roughly 25mins, If you would like to leave it longer to fully break down the vegetables you may do so. When you’ve checked your Shakshuka at around 25minutes you can very carefully remove the skillet pan from the oven using appropriate oven gloves, then with a dessert spoon, create 2 small nest like holes in the middle of the dish and crack your happy hen eggs inside. Place the skillet back into the oven for around 5 mins to allow the eggs to cook through, however you like them, runny, soft or hard? 5 minutes will allow then to cook slightly runny.

After 5 minutes, carefully remove the skillet pan from the oven and leave to cool for 5 minutes (a good time to make yourself a coffee) add coconut yoghurt to serve and sprinkle with fresh parsley and a drizzle of quality extra virgin olive oil. 

Eat, Sweet

Spiced Pumpkin Pie

Tis the season for heart warming food and in my book anything pumpkin spice with all things nice is a winter winner!

I’ve actually never made a pumpkin pie or actually ever tried it, coming into Australian winter my social media feed has been flooded with fellow foodies creating spiced pumpkin lattes, pancakes, smoothie bowls, pies, cakes the lot, I can’t understand people that don’t love pumpkin spice or chai?! It quite literally warms your soul!

So, after indulging in chai tea, mulled wine and cider this autumn/winter, a pumpkin pie was exactly what I needed and Holy Moley, it was everything I had dreamed of and more. I’m always sceptical of how certain recipes will turn out when creating and making them for the first time but this turned out so well! I would definitely make it again for a winter Christmas in July event for sure!

Gluten free, Paleo, Dairy Free, Refined sugar free

Ingredients:

Filling:

¼ Jap pumpkin

1 brown speckled banana or ½ cup of apple sauce

1 tbsp tapioca flour

2 tsp cinnamon

1 tsp nutmeg

1 tsp ground cloves

1 tsp ground ginger

1 tsp of fresh ginger

1 tsp of ground all spice

2 tbsp full fat organic coconut cream

2 tsp raw (autumn if you can a seasonal) honey

1 tbsp grass fed pork gelatine

Pinch sea salt

Base:

X2 ½ cups of LSA meal

X2 eggs

X2 tbsp coconut sugar

2 tsp ground ginger

1 tsp tapioca flour

Extras for topping:

1 tbsp toasted pumpkin seeds

2 tbsp natural coconut yoghurt

Dusting of cinnamon

Method:

The base

Starting with your base, add all ingredients into a large mixing bowl and combine until the mixture form a firm round ball of dough – this should not be sticky or dry.

Place dough inside your 23mm pie tin or dish and flatten the dough with the back of a metal spoon to create an even smooth surface.

Once this is done, prick the base with a fork to allow the ‘pastry’ base to breath when its baking I the oven. The oven should be warmed to 170F for 10-15minutes, the pastry should be firm to touch and slightly browned, not burnt and crispy. Set aside to cool when based to perfection.

The Filling

Start by cutting the skin off your jap pumpkin and de seeding, then cut pumpkin flesh into small chunks and add to boiling water with a pinch of salt.

When the pumpkin is soft to prick with a fork, remove your pan from the stove and drain the pumpkin through a fine mesh sieve. Using a spatula, start to stir and scrape the pumpkin mash through the sieve into a bowl so the pumpkin comes through smooth and light – forming a puree consistency.

When all pumpkin has been sieved into a bowl, add all filling ingredients together in the mixing bowl and stir until fully combined.

Transfer your pumpkin mixture into a saucepan and place on a very low heat to warm through to activate the gelatine granules – this allows the gelatine to bloom. Stir and leave to settle for around 5 minutes over a low heat. 

Leave to cool for around 5-10minutes before pouring your deliciously smelling filling over the base. Smooth over and place inside your fridge for up to 4 hours to set, the longer the better. 

When it’s time to delicately carve up this beauty, decorate the top with a dollop of coconut yoghurt, a dusting of cinnamon powder and lastly sprinkle with toasted pumpkin seeds.

I hope you enjoy this as much as I did, its such a pleasure just to look at and eat!

Animal Protein, Eat, Savoury

Zesty Peanut Butter Noodle bowl

Being a little obsessed with Ramen, I’ve really been keen to play around and experiment with varies flavours to create different, nutritious and delicious, healthy ramen bowls – Ramen is said to have originated in China, then taken over to Japan in 1859. So whilst you can find some Thai inspired ramen, I couldn’t bring myself to call this meal ‘Ramen’ as technically speaking, It’s not. However I’ve combined the flavours of Thailand with the qualities of a traditional Japanese ramen bowl and spliced them together to create this wonderful winter Saturday night warmer. 

Spiced with fresh ginger, turmeric, garlic, fish sauce, coconut aminos and beef broth, this bowl is everything you need to warm your body and soul. 

Ingredients: Serves 1

  • 1 tbsp raw peanut butter
  • 1 red chilli
  • Snap peas
  • 1 clove garlic
  • 1/2 spaghetti squash
  • 1 tbsp grated fresh ginger
  • 1 tsp grated fresh turmeric
  • 1 spring onion
  • Sweet potato
  • Red cabbage
  • Shitaki mushrooms
  • 1/2 can coconut milk
  • 1 tsp bone broth concentrate
  • 1 tbsp fish sauce
  • 1 tbsp coconut aminos
  • 1/2 cup boiling water
  • 1/2 tsp raw honey
  • 50g grass fed minced beef
  • 1 tsp Chinese 5 spice
  • Fresh coriander 
  • Juice of 1/2 a green lime 
  • Drizzle of EVOO
  • Salt and pepper

Additional extras:

  • Soft boiled egg to serve
  • Chopped peanuts
  • 1 tsp chilli flakes 
  • Back sesame
  • Additional veggies

Method: 

This method is very similar to my previous post https://goodnessgreen.blog/2019/05/18/paleo-ramen-bowl/ with some small changes, the preparation is very similar. 

Cooking up the broth is so easy and given how intense you like the flavour, you can let it sit over the day or in this instance I left the broth on the hob for around 90mins – The timing is up to you on this one – however I do recommend, the longer the better to give the flavours time to sit and activate. 

Add the ginger, garlic, juice of 1/2 a lime, honey, fish sauce, coconut aminos, turmeric, salt, pepper,  bone broth concentrate and hot water to a small pan on the lowest heat to allow your broth to simmer lightly. 

Dice some sweet potato leave in the oven to roast for around 20 minutes. The spaghetti squash will need to go in a separate pan, cut in half, cut side down with 1/4 cup of water in the bottom of the pan (this will help steam and soften the noodles away from the hard skin) cook this for around 20 minutes also. When ready, leave to cool for around 10-15 minutes, then take a fork and gently pull the noodles away from the skin and place 1/2 the noodles in a bowl ready to pour your broth over.

20minutes before you are ready to serve and slurp this bowl of goodness; 

In a blender, blitz up 1/2 a can of coconut milk, 1 tbsp of peanut butter and half a red chilli. When smooth and creamy, pour this into your broth and stir. The smell alone should tell you, its going to taste amazing!

Whilst your broth and peanut sauce are simmering softy, start on your fillers – Lightly boil the veggies and snap peas together, blast some heat onto the shitaki mushrooms, spring onion and red cabbage by tossing these for 90s in a non stick pan to soften them up. 

Next the beef mince – This too just needs a quick blast of heat in a non stick pan, take your Chinese five spice and sprinkle it onto the meat and fry in its own fat until cooked to your liking. 

All for one and one for all – Now, you can place all the fillers in at the very end to make your bowl look pretty, or as I did tip everything into the saucepan altogether (accept the meat) leave for 2 minutes allowing the veggies and mushrooms to absorb some of the sauce, then finally pour everything into your noodle bowl, placing the beef mince on top and decorate with fresh coriander, chopped peanuts, chilli flakes, fresh chilli and black sesame, with a dash of EVOO to pull out some more of those intense flavours. 

I Loved this bowl so much and I really loved making it. If you do so happen to take the time to make this goodness bowl, please let me know how you get on 🙂

Eat, Pancakes, Sweet

Lamington Pancakes

A quality Australian tradition the Lamington has been around for centuries, originally the cake consists of sponge cake dipped in chocolate, sprinkled with fine desiccated coconut, It was actually created by accident from a maid-servant to Lord Lamington, The eighth British Governor of Queensland.

Here I have decided to make my own paleo version – It’s gluten free, suitable for vegetarians and delicious to all! I have made this recipe with my standard pancake recipe mix, along with some added extras, with a rich creamy chocolate ganache thats made with 4 quality, natural Ingredients. To make this Lamington inspired stack, follow the recipe below.

Ingredients for pancakes:

X 2 tbsp of Cavassa Flour

x 1 tbsp of almond meal

x 1 tbsp coconut flour

x 1 tsp baking powder

x 2 TBSP fine desiccated coconut

x 1tsp vanilla extract

X 2 pasture raised eggs

x1 Ripe banana

x 1/2 cup of fresh almond milk

X1 small fresh or frozen banana or half a large banana 

Pinch of pink rock salt

Ingredients for Chocolate Ganache:

x1 Small orange sweet potato

x1 Large avocado

x2 Heaped TBSP natural cacao powder

x1 -2 tsp Maple syrup

Method:

Start by adding ALL pancake ingredients into a food processor, blitz up until smooth and gloopy.

Heat a frying pan with coconut oil on a medium heat and tilt pan so oil spreads evenly around the pan.

Using a ladle or tablespoon scoop and pour the runny mixture into the pan so it forms a small circle in the middle, when you see air bubbles start to rise up through the pancake this is the all go to start flipping! Ensure you have a quality spatular that can easily slide under the pancake so you achieve a successful flip each time. 

Each pancake should require around 2 mins frying time each side. 

The topping – Chocolate Ganache:

Once you’ve got yourself a small stack of pancakes and they’ve cooled from hot to warm, you can start on you’re tasty topping. 

This should take less than 2 mins to make, It’s super fast and easy.

Step 1:

Starting with you small sweet potato, Peel the skin and chop by dicing into small chunks. Boil water in a small saucepan and cook sweet potato through until it’s soft to prick with a knife.

Step 2:

You can make this whole recipe with by mashing ingredients into a mushy texture with a fork or if you have the privilege of owning a food processor, I would highly recommend using this as it will rid of any lumps and bumps in your ganache.

Step 3:

Place your whole avocado, cacao powder, maple syrup, and sweet potato in a bowl or food processor and begin blitzing or mashing to creating this delicious chocolate frosting. When you’re happy with the texture and consistency, you can start to spread this drool worthy chocolate goodness over your pancake stack as you wish – here I have literally covered the stack all over – top and bottom, side to side! I’ts hard not to when you make frosting this good! Lastly, you can decorate with some shaved coconut strands.

Enjoy x

Eat, Sweet

Paleo French Toast

Bonjour, Du pain grillé français?

Hell yes to that! 

I have been making this banger of a breakfast for years! It’s simple, cheap, filling, nourishing, nut free and PALEO. 

It’s basically a sweet omelette and It totally works. 

Ingredients: 

Serves 1

  • 3 eggs
  • 1 tsp vanilla extract 
  • 1 tbsp water
  • 2 tsp cinnamon
  • 1 tsp nutmeg 

Method:

Whisk these ingredients together and if you like you can add fresh fruit to the batter or add it later when the batter has cooked through. 

When the batter is runny (the consistency of an omelette batter), pour into an oiled non stick pan and cook as you would a regular omelette. 

I tend to add frozen blueberries and a good serving of maple syrup, however this batch as shown in the photo above has COYO yoghurt, stewed apple and raspberry which I’ve decorated with some dragon fruit stars.